Air Fried Mushrooms

Air Fried Mushrooms

This was an idea shared by Justin from Long Beach Mushrooms. They are my local source of mushrooms. They have subscription boxes available for purchase and you pick them up directly at their farm.

Anyway, he said to make a batter of sorts and then dry. You can then just air fry. I made the basic egg and flour process as you would with fried chicken and they are very tasty but I wanted to try other options and this is what I have compiled from recipes all over the internet.

I have made these with lion’s mane and oyster mushrooms and they were both delicious.

Ingredients

  • 1 lb of mushrooms
  • garlic powder
  • salt
  • black pepper
  • dairy-free milk – I love oat milk as it is thicker, it cooks well and coats well but almond or cashew milk works too.
  • chickpea flour
  • white rice flour
  • cornstarch

Note: You can use just All Purpose Flour instead of trying to hunt down the white rice and chickpea flour. This can also be used in place of the corn starch for the dry mix.

Instructions

  1. Wet Batter
    1. In a shallow bowl, add the milk, chickpea flour, white rice flour, garlic powder, salt and black pepper. Whisk all that together.
  2. Dry Mix
    1. In another shallow bowl, just add the chickpea flour, white rice flour, garlic powder, salt and black pepper. Whisk all that together.

Breading the Mushroom Pieces

  1. Clean and cut the mushrooms in larger chunks like chicken nuggets.
  2. Start by coating it in the wet batter. Make sure it is fully covered.
  3. Gently move over to the dry mix and coat it in that to make sure it is fully coated.

Air Frying

  1. Preheat the air fryer to 375 degrees F / 190 degrees C.
  2. Once it is ready, add the strips / nuggets.
  3. Set it for 10 minutes.

That is a very simple recipe and can be adjusted to your tastes and what ingredients you may already have. You can use any dipping sauce you want to make. I found a bunch online but that is up to you. I would suggest trying out a few and seeing what you like.


Mushroom Chili

Mushroom Chili

This is a mix of a few different recipes and I did not realize chili could be so complicated but I kept I tried to keep it simple. The first time I made this, I did not even add the dry ingredients:  chili powder, sugar, cumin, black pepper or garlic powder. I used a Kroger Original Chili Seasoning Mix and that was tasty. I made this first with ground beef and added the mushrooms to it but the second time around I didnt even add the beef. I have been making it with just the mushrooms after that and the beef was not really missed.

Ingredients

  • 1 lb of mushrooms (I mainly used oyster for this too as it resembles meat more than the others but any thicker mushrooms would work.)
  • 1 Large Onion, Chopped (about 2 cups)
  • Olive Oil
  • 6 tbsp of chili powder
  • 4 tbsp of sugar
  • 3 tbsp of cumin
  • 1 tsp of black pepper
  • 1 tbsp of garlic powder
  • 1 can of tomato paste
  • 2 cans of diced tomatoes
  • 4 cups vegetable broth
  • 3 cans of beans – this is your choice on beans but drain the liquid before adding to chili. I used kidney beans.

Instructions

  • Clean and cut mushrooms into 1/4 inch pieces. Set them aside.
  • Add the olive oil to a pot and cook the onions down until they are clear and soft.
  • At a medium heat, add the mushrooms to the pot with the chili powder, garlic powder, black pepper, sugar and mix. If you are using the Chili mix from the packet, mix that it instead.
  • Mix the entire contents in the pot and make sure all of your mushrooms are coated.
  • Let the mushrooms to cook down and soften a little.
  • Once they have softened, add the tomato paste, diced tomatoes, the vegetable broth and the beans. Remember to drain all the liquid from the cans of beans before adding to the pot.
  • Stir everything in the pot and set the heat to low as we do not want this to burn and cook slower.
  • Leave it on the low heat and simmer for 40 minutes.

That is really it for this recipe. This goes for any of the recipes on my page, please feel free to adjust anything you may think it needs or if scale it back if it does not seem right. I am just giving you a starting point and you can make the recipe your own.

Cream of Mushroom Soup

Cream of Mushroom Soup

Welcome to this somewhat mashed up recipe. I combined a few recipes I found online but also checked my cabinet. A note on the heavy cream and evaporated milk. I did not use heavy cream as I did not have any and I wanted to use what I had. Most recipes I looked at said just 1 cup of heavy cream but I ended up adding more chicken broth since I pureed the entire thing. It thinned it out so it was not so thick.
Servings: 4 to 6 servings

Ingredients

  • 1 pound fresh mushrooms (I mainly used Oyster mushrooms but not restricted to just those.)
  • 1 Large Onion, Chopped (about 2 cups)
  • 6 tablespoons unsalted butter
  • 1/3 cup all purpose flour
  • Salt and Ground Black Pepper
  • Diced Garlic Cloves – 3-4 cloves
  • 1 can of ´Evaporated Milk – 12 oz or 1 cup of heavy cream
  • 4 cups chicken or vegetable broth or stock

Instructions

  • Clean and cut mushrooms into 1/4 inch pieces. The thicker stems are fine if you are going to puree the whole thing. Leave these on the side.
  • In a large pot, melt the butter with and cook the chopped onions and garlic on a medium heat. Cook until it is soft but not brown.
  • Add the salt and pepper to taste. I didn’t add much because I did not want it to be too salty or peppery. You can always add more but you cannot take it away if you added too much.
  • Toss in the mushrooms from step one and raise heat to medium.
  • Cook the mushrooms until they soften and mix occasionally so they do not stick to the pot.
  • Once the mushrooms have softened, add in the flour and mix all that to coat the mushrooms.
  • Drop in the broth and mix that around to coat the mushrooms. It will look like a chicken pot pie mixture and that is fine. You may need to add more broth if you are fully pureeing as I did.
  • Let that cook on low heat for about 20 minutes and stir occasionally.
  • I transferred to a large mixing bowl and used the immersion blender and slowly added the evaporated milk.
  • This is where also added more chicken broth to thin it out as it was thick but that is your preference.
  • I poured back into the pot and cooked it for another 10 minutes or so.

Well, that is it for the soup. You can now taste it and see if you need / want to add more salt or pepper. This was split into containers  and refrigerated as it was too much to finish in one sitting for 2 people.


Basic Drip Irrigation

Hello and welcome to the Basic Drip Irrigation post. If you came from my video on YouTube, Welcome! If you found me any other way, Welcome as well!

Let’s get right to it.

Shopping List:

Basic Process:

  • Connect Hose End Splitter Spigot
  • Connect Orbit Timer
  • Connect Pieces from Main kit: Backflow preventer, pressure regular and connector to switch over to main 1/2 inch water line.
  • Use tephlon tape on connection points and wind clockwise so it doesnt come off as you are adding pieces.
  • Attach main 1/2 inch line and start combining connector pieces to put together a path to cover all your beds, containers or in ground areas.
  • Use Deluxe hole punch to connect 1/4 inch lines to main line and then off to sprayers and / or drip line with built in drippers.
  • Turn on water to clean out 1/2 main line of dust and debris.
  • Make sure all your areas are covered.
  • Use figure 8 piece to cap off your main line.
  • Set your timer and run it to test that there are no leaks.

Tips and Tricks:

  • Draw out a diagram of your garden to know how many connections you will need for your 1/2 inch main line. Map out the tees, elbows and extenders. Check the pieces in the kit and buy necessary pieces before going home to install.
  • This is mainly for the line without the holes. The line with the built in drippers is thinner and easier to get them connected. I use the lighter to help soften the end of the 1/4 inch line to help get the barb connectors in. You can also have some warm water, in a container, to get the same result. You can also leave the line in the sun to make it more pliable.
  • Lay out your 1/2 inch main line in the sun to help mold it around the areas that you need.
  • Don’t be afraid to cut that 1/2 inch line or any other pieces but remember to measure twice and cut once.
  • Don’t take yourself too seriously.
  • Practice makes better.
  • Prepared to get wet! It happens.

I think that this is the very basics to get you started. If you have any questions and /or constructive criticism, please comment. I will try to keep up with the comments and may even edit this post if there is something that is missing. I’m sure there is as I’m only human.

I hope that this post gets you thinking about taking on the task and you will learn something along the way. It would be amazing if you get going on the install and completing it.

This is not meant to be all inclusive of every situation and it will not fit everybody’s space but it is a starting point. You can start with a smaller main kit. I believe there is one for just container / patio garden that doesn’t include the 1/2 main line. That’s fine. Use it if it fits better.

You don’t have to even buy a kit and buy each piece individually but just be sure to grab all the same pieces, especially for the first few pieces connected to the main line. You can even add a filter to the main line but I never do and the systems run fine. It is all about customizing it for yourself.

If you are a visual learner and would like to see a video overview of this, check out the accompanying YouTube video here: https://youtu.be/J1rVbpJ8LuA

I hope to continue putting out content on YouTube and may keep adding blogs to go with those videos. I like providing both mediums. Different people learn different ways.

Peace,

Luis


Food Gardening for Connection Series

Part 1: What Shifted In Our Family

Written by: Melissa Botten: MOM, CHN, RYT, Student of Spirituality, Bosslady🐝

There is something really special about seeing a seed in your garden, turn into food. Food gardening is like creating magical experiments, especially for the novice gardener like myself. I am always game for a good challenge plus personally/astrologically, very detail oriented. So, growing things I may someday eat, is super fascinating to me….. My Virgo tendencies, allow me to further my curiosity and pay close mind to the whole process & in this case, turning over a seed into an edible food item.

Just over 2.5 years ago, I was invited to the North Long Beach victory garden, for the tomato festival. While there, I asked all of the booth presenters & food gardeners if they could help me get my kids a job. What I meant was, “put them to work, get em’ outside volunteering, allow them to learn something, and to help our family’s mental health improve. Little did I know, that we were about change our family’s lives in an amazing way.

Food Gardening, introduced us to creating a food source, getting outside in a new way and putting our hands in Mother Earth with more of a purpose.

We also got to meet new people of common interests, improve our relationships with each other, build a greater sense of hope and inspiration & overall, improve our mental health.

Anyone else out there have trouble getting your kids to eat regular, routine amounts of veggies and fruits? Is it a fight, or are you at an improved level from the last time you checked? You laugh hearing this, but Wow….. I am serious! My children are very open minded and excited to try new things, but they are also my greatest critics when it comes to food and innovation. So, if you ever really wanna know the truth, ask a child, or just ask mine.

While maintaining balance as best we can as parents, putting the green stuff out onto the table is risky. Will it go to waste, will they pretend to eat it, then hide the evidence in their cheeks or pockets like I used to do? I remember one of my aunts telling me as a new mom, that my children will act & do to me, as I did to my parents. Ha! I’m doomed.

As a young lady growing up during some of the trendiest, dangerous and most fad diets in history, I was so confused about food & nutrition. I also knew at a young age that I was a vegetarian, in my heart I knew. I was just like many kids that grow up in the mountains or have dad’s that are hunters. We eat the meat because that’s just what we do for meals and family tradition. Both of my parents were providers and my dad was the hunter.

From a young age I had food allergies, which did help devote my need for understanding vegetables, consuming plants, roots & herbs….. and the nutritional advantages & intolerances that go along with it. Because of all of the information that I didn’t understand at that time, my weight ups and downs became part of my lifestyle. Hi I’m Melissa, I’m a recovering yo-yo dieter.

My experience was mostly because of the fact that I didn’t know what I was doing, I was following trends. and a trend is not necessarily a bad thing but what’s missing most of the time is information around that.. TREND.

Understanding that not everyone can afford a nutritionist or go to school to get a certification in nutritional science, it’s hard to know who to talk to about your health concerns that are personal to YOU. There are so many opinions out there, do this, do that, not this, try that. However when we discovered that we can grow our own food and how easy it can be, everything changed. This is where our family and my private practice took nuritional healing to the next level.

This is just a another good thing about holistic healing & nutrition, it has little to no side effects except for improving your health. Let a kid plant a seed and see what happens. Let them dig into the ground, spit in the soil on top of that seed(this is fascinating for the DNA will grow into the seed of that plant). This technique of swapping saliva is essentially, claiming that food source for the person who spit on it. I’m not sure how a much closer you can get to your food than that.

So dig in friends! Grab a simple pot with ventilation in the bottom, get some soil and seeds, and get growing! Sprouts from growing veggies are ready within days… Your thyroid will thank you. Radishes and peas grow REALLY FAST as well as many other veggies that will yield harvest in 90 days or less. Also, this food your growing… it’s ALL FREE. So if anything, save your money for vacations and grow your own food!

The Best Chicken Soup You Will Ever Eat

Hello!

I am back with another recipe. This one comes from a fellow YouTube Creator. She shared on a comment on how I could use my greens. She made a great video on making this soup. I was granted permission and here is the recipe.

Here is the video link:

Adrienne’s Chicken Soup

Ingredients:

  • 2 to 3 chicken leg quarters
  • 1 cube chicken Bouillon
  • 1 cup brown rice
  • 2/3 cups lentils
  • 1 Tbsp Chia seeds
  • 2 stalks chopped celery
  • 2 medium or 1 large carrot chopped plus the tops of one
  • 1 Tbsp chopped garlic & parsley
  • 1 Tbsp of powered garlic
  • 1/2 medium onion chopped
  • 1 large or 2 small potatoes diced (or use a large zucchini)
  • small beet plus the leaves chopped
  • 3 frozen brussel sprouts
  • a few okra – You can substitute some frozen kale, spinach or greens you like.
  • Spice Mix:
  • 1 bay leaf
  • 1 tsp turmeric
  • 1 tsp chili powder
  • 1/4 tsp cumin
  • 1/2 tsp curry powder
  • 1/2 tsp black pepper
  • 1 Tbsp pink salt (or whatever salt you use)
  • 1 Tbsp Worcestershire sauce (optional)

Directions:

Place all the ingredients in a pressure cooker and add water.

WARNING….. DO NOT FILL THE WATER ALL THE WAY TO THE TOP OF THE PRESSURE COOKER, LEAVE ABOUT 2 INCHES AT THE TOP WITHOUT WATER.

Bring it up to pressure and cook at slow rock for 25 minutes.

When pressure goes down & pot has cooled (usually around 1/2 an hour) take the lid off.

WARNING: DO NOT remove lid while under pressure (still steaming or hissing). MAKE SURE THAT THE PRESSURE IS OUT OF THE POT.

(Note: you can cook this without pressure cooker, but will take twice as long to cook)

When safely opened, dip out chicken onto plate and using a couple of forks, separate meat from the bone and put chicken pieces back into soup and stir all together.

I usually add a packet of unflavored gelatin to mine for better health, the gelatin contains collagen that helps rebuild the cartilage in your joints, but this is optional too.

Just fill a coffee cup with about 1/2 cup of warm water, pour in the pack of gelatin and stir till it dissolves into the water then pour it into the pot of soup and stir in.

Soup is now ready to eat. Enjoy.

We are on YouTube!

Hello and welcome!

I have been uploading regularly to YouTube over the last couple of months and would love for you to join me! All you gotta do is just tap the banner and follow our journey over there! Don’t forget to smash the subscribe button followed by the bell icon to get notified when we upload!

Thank you for stopping by!

Luis T

P.S. I am working on bringing in guest bloggers with posts that are related to gardening. Please stay tuned for that!

Banana Zucchini Bread

My wife made this delicious bread with a homegrown zucchini. She started with the recipe from the link but had a few modifications.

Taste of Home

This is the modified version:

  • Total Time
  • Prep: 20 min. Bake: 75 minutes+ cooling 
  • Makes
  • 2 loaves

Ingredients

  • 4 large eggs, room temperature
  • 1 1/2 cups sugar
  • 1 cup of applesauce
  • 2 medium ripe bananas, mashed (about 1 cup)
  • 3 cups all-purpose flour
  • 1-1/2 teaspoons baking powder
  • 1-1/2 teaspoons baking soda
  • 1-1/2 teaspoons ground cinnamon
  • 1 teaspoon salt
  • 1-1/2 cups shredded unpeeled zucchini
  • 1 cup of mini chocolate chips

Directions

  • In a bowl, beat eggs. Blend in sugar and applesauce. Add bananas and mix well. Combine the flour, baking powder, baking soda, cinnamon and salt; stir into egg mixture. Stir in zucchini and mini chocolate chips just until combined.
  • Pour into two greased 9×5-in. loaf pans. Bake at 325° for 1 hour and 10 minutes or until a toothpick comes out clean. Cool for 10 minutes. Remove from pans to wire racks to cool completely. 
If Cooking for Two: Wrap and freeze one loaf to enjoy later.
That’s it. I’m enjoying a slice with coffee as I type this. Let me know in the comments if you made it and the results.
Also, let me know if you would like to see more recipes.
Luis T

Community Gardens

We are not all blessed with having the space to have a garden at home. Container gardening only takes keeps you satisfied for so long and that is where the community gardens come in. Community gardens vary by state, city, or even neighborhoods and no 2 are alike but the idea is all the same. They unite residents and provide a place to grow our own produce. Fees, rules, and regulations will differ from garden to garden. Most gardens require a fee, and some also require community service hours. Gardening is growing in popularity and space at the community gardens is limited. Many, if not all, have a waiting list. The difference in community gardens does not end there. Plot size from garden to garden will vary but should not be an issue. Most plants don’t require tons of space and should coexist without any issues.  Some plants will need trellises or cages to help control growth but it should not be a problem. Of course, gardens should be planned out. Once the plot is all planned out, the soil may need to be amended with compost and other organic material. A great benefit to having a plot in a community garden is that most, not all, will have compost and/or mulch for its gardeners. Some gardens may also have manure that can be added to plots to encourage growth.  These “extras” may be free or come at a fee. Along with these extras, the garden may have a stand that sells seeds or seedlings that can be purchased but these can also be bought elsewhere. After you have seeds or seedlings planted, you need to know how to keep them growing. Gardening does not come easy to anybody and books can only explain things so much. Some books and online resources are so broad sometimes that we are left to figure it out on our own. This is a perfect excuse to talk to your fellow gardeners and see what has worked for them. Your new friends may be full of useful information, tips and ideas that may have worked for them. I am all for making our own mistakes and learning from them, but what is wrong with getting some help along the way? Meet your plot neighbors and as many people as you can and form new friendships. Forming new friendships is part of life and helps us enjoy it. Once these friendships have been formed there is a feeling of community. Different people garden for different reasons, but getting out of the house and interacting with other people has its own rewards. Technology has put most people behind a computer screen and avatars are the only way we interact with the world. So, hop on the web and look up the community gardens that may be in your area. You may be shocked to find that you may have one nearby and you never knew about it. Luis

Let’s Get Vertical

Vertical gardening help those of us that have little to almost no space. The plants do not always need to be planted in the ground or beds but can also be grown in containers. A trellis or structure can also be made to fit into many containers. The only real requirement is for this structure is that it supports the plant and fruits as some can get really heavy. 

(THIS POST MAY CONTAIN AFFILIATE LINKS FOR YOUR CONVENIENCE. PLEASE REVIEW OUR DISCLOSURE FOR MORE INFORMATION.)

Teepees and trellises are some of the easiest things to build from inexpensive materials. All you need for a teepee is three posts or poles and some sort of rope or twine. If you are more of a handier person and would not mind spending a little more time, there are more options. Trellises can also be made of PVC piping or a heavier material but may not necessarily be cheap. Although, there are places out there that “up-cycle” and may even give away materials. If you are like me and are trying to keep costs low, these are great options. 

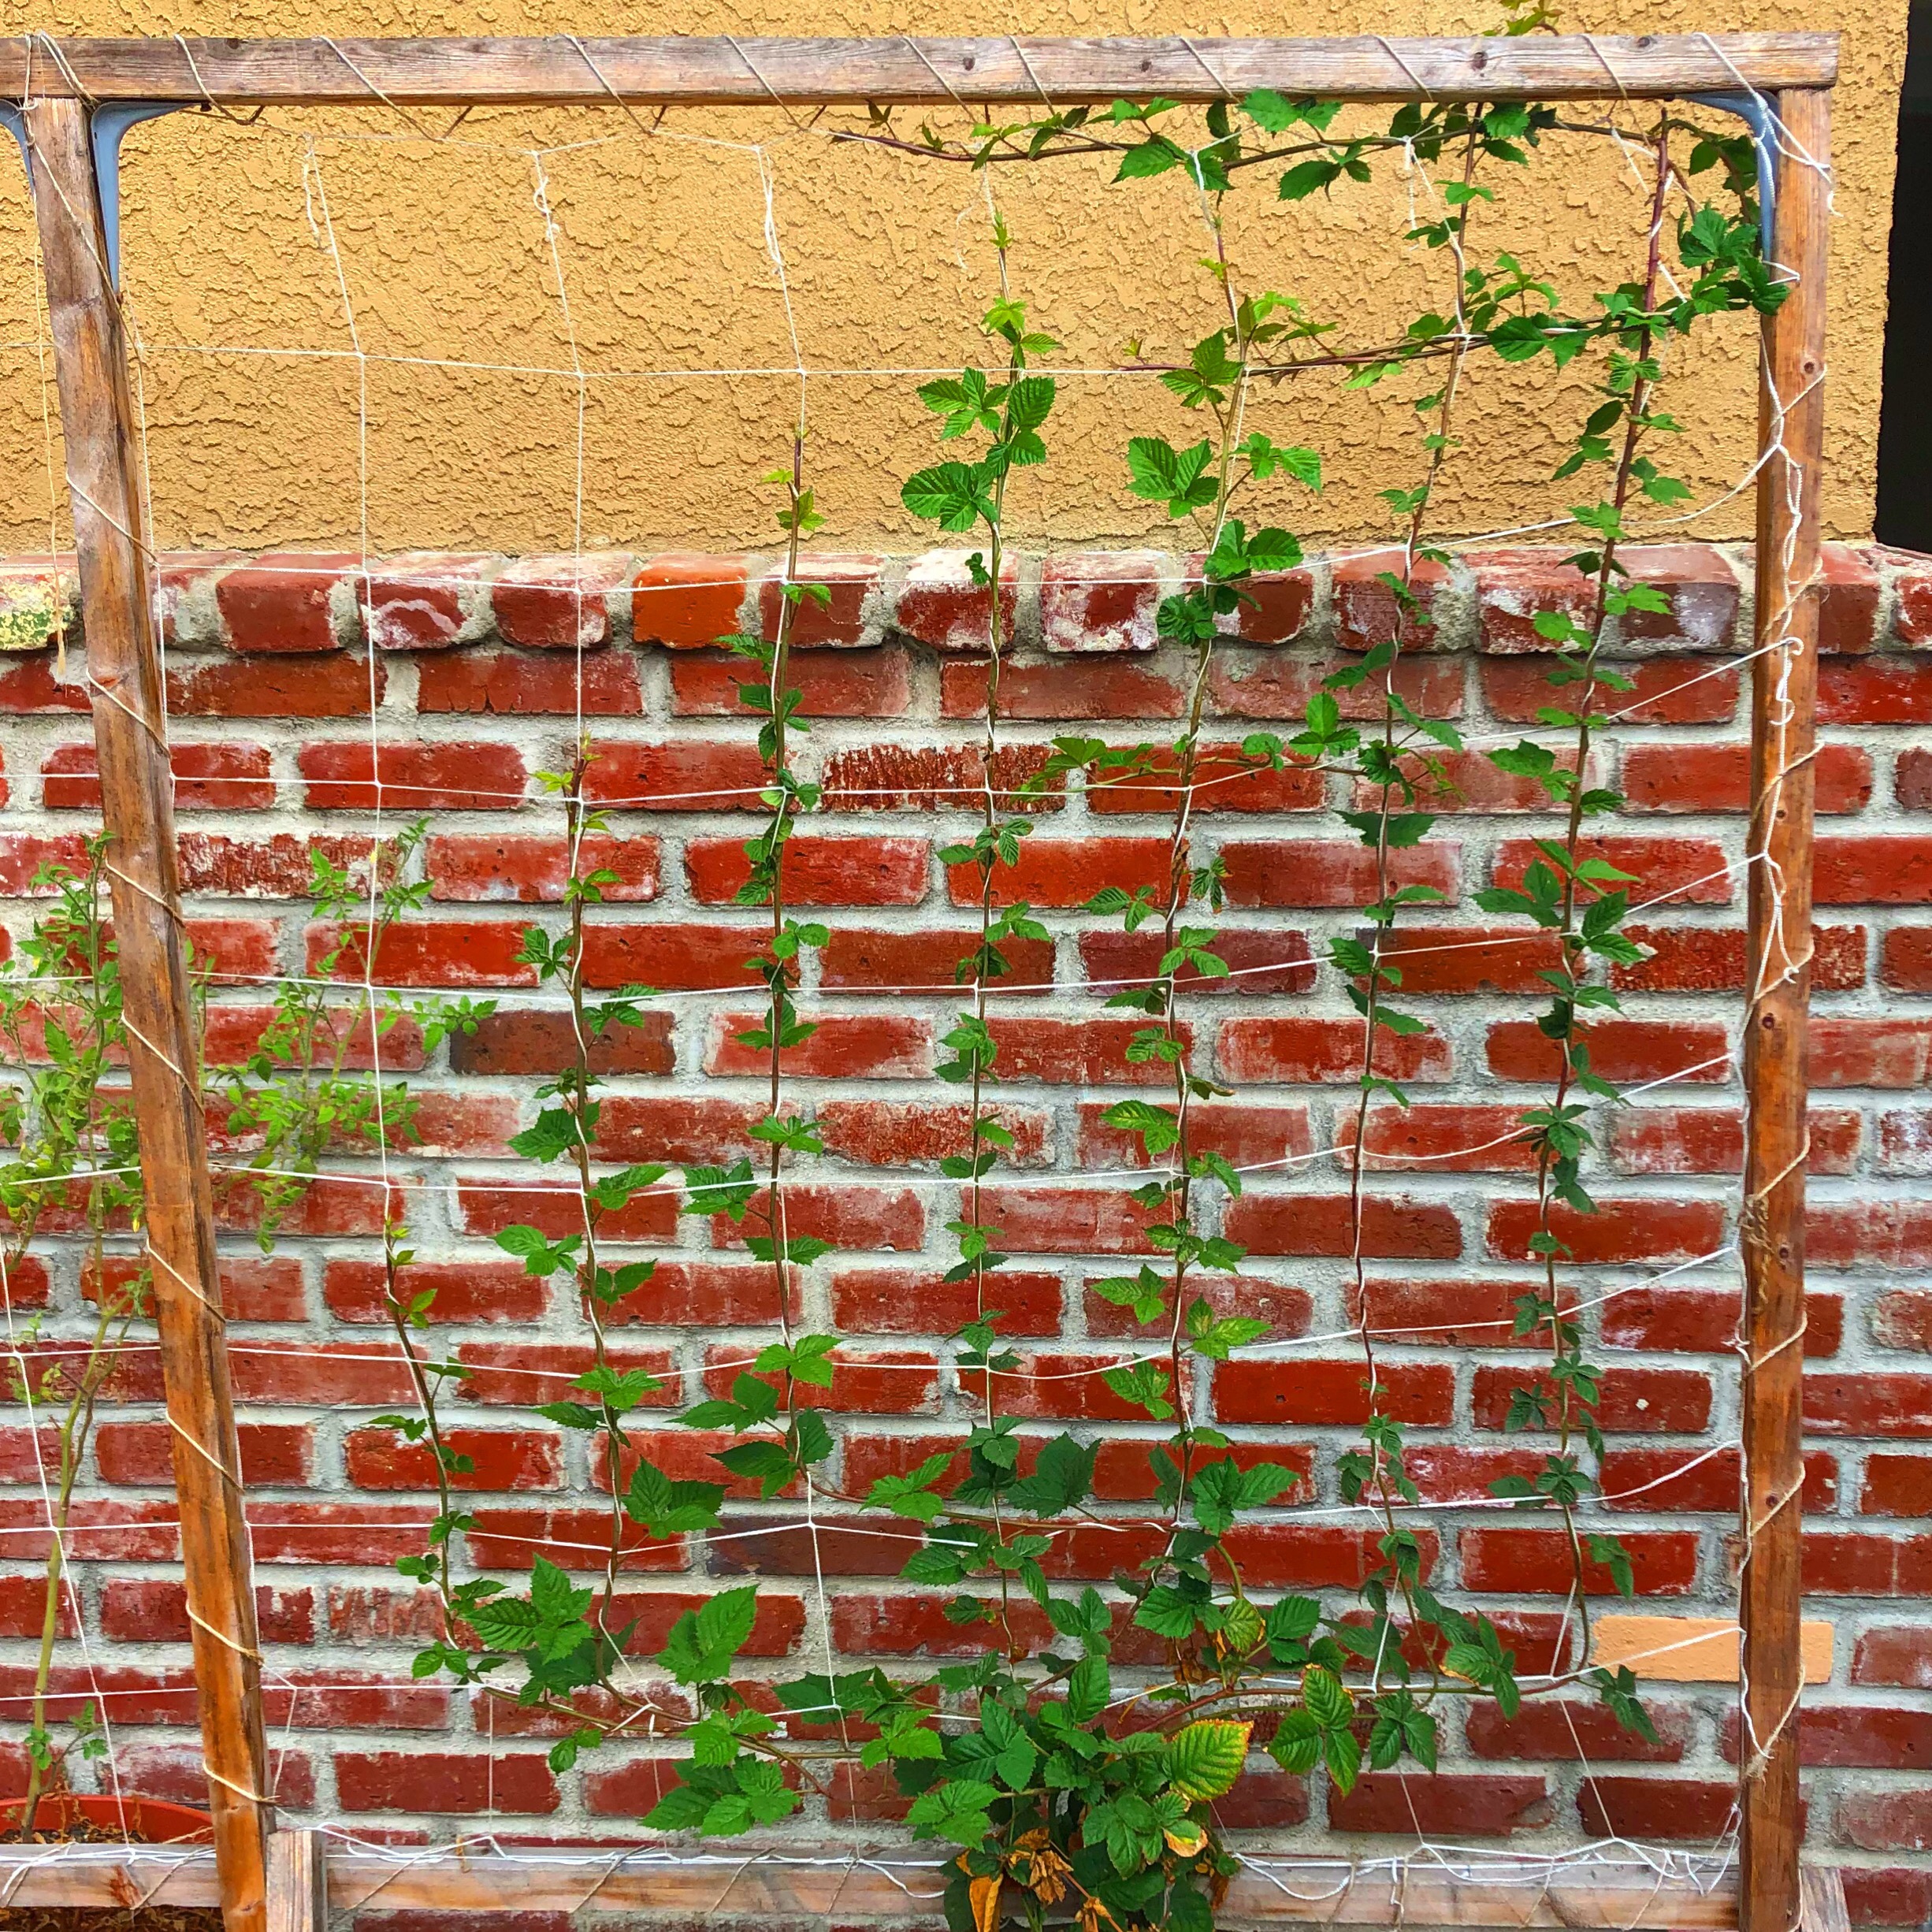
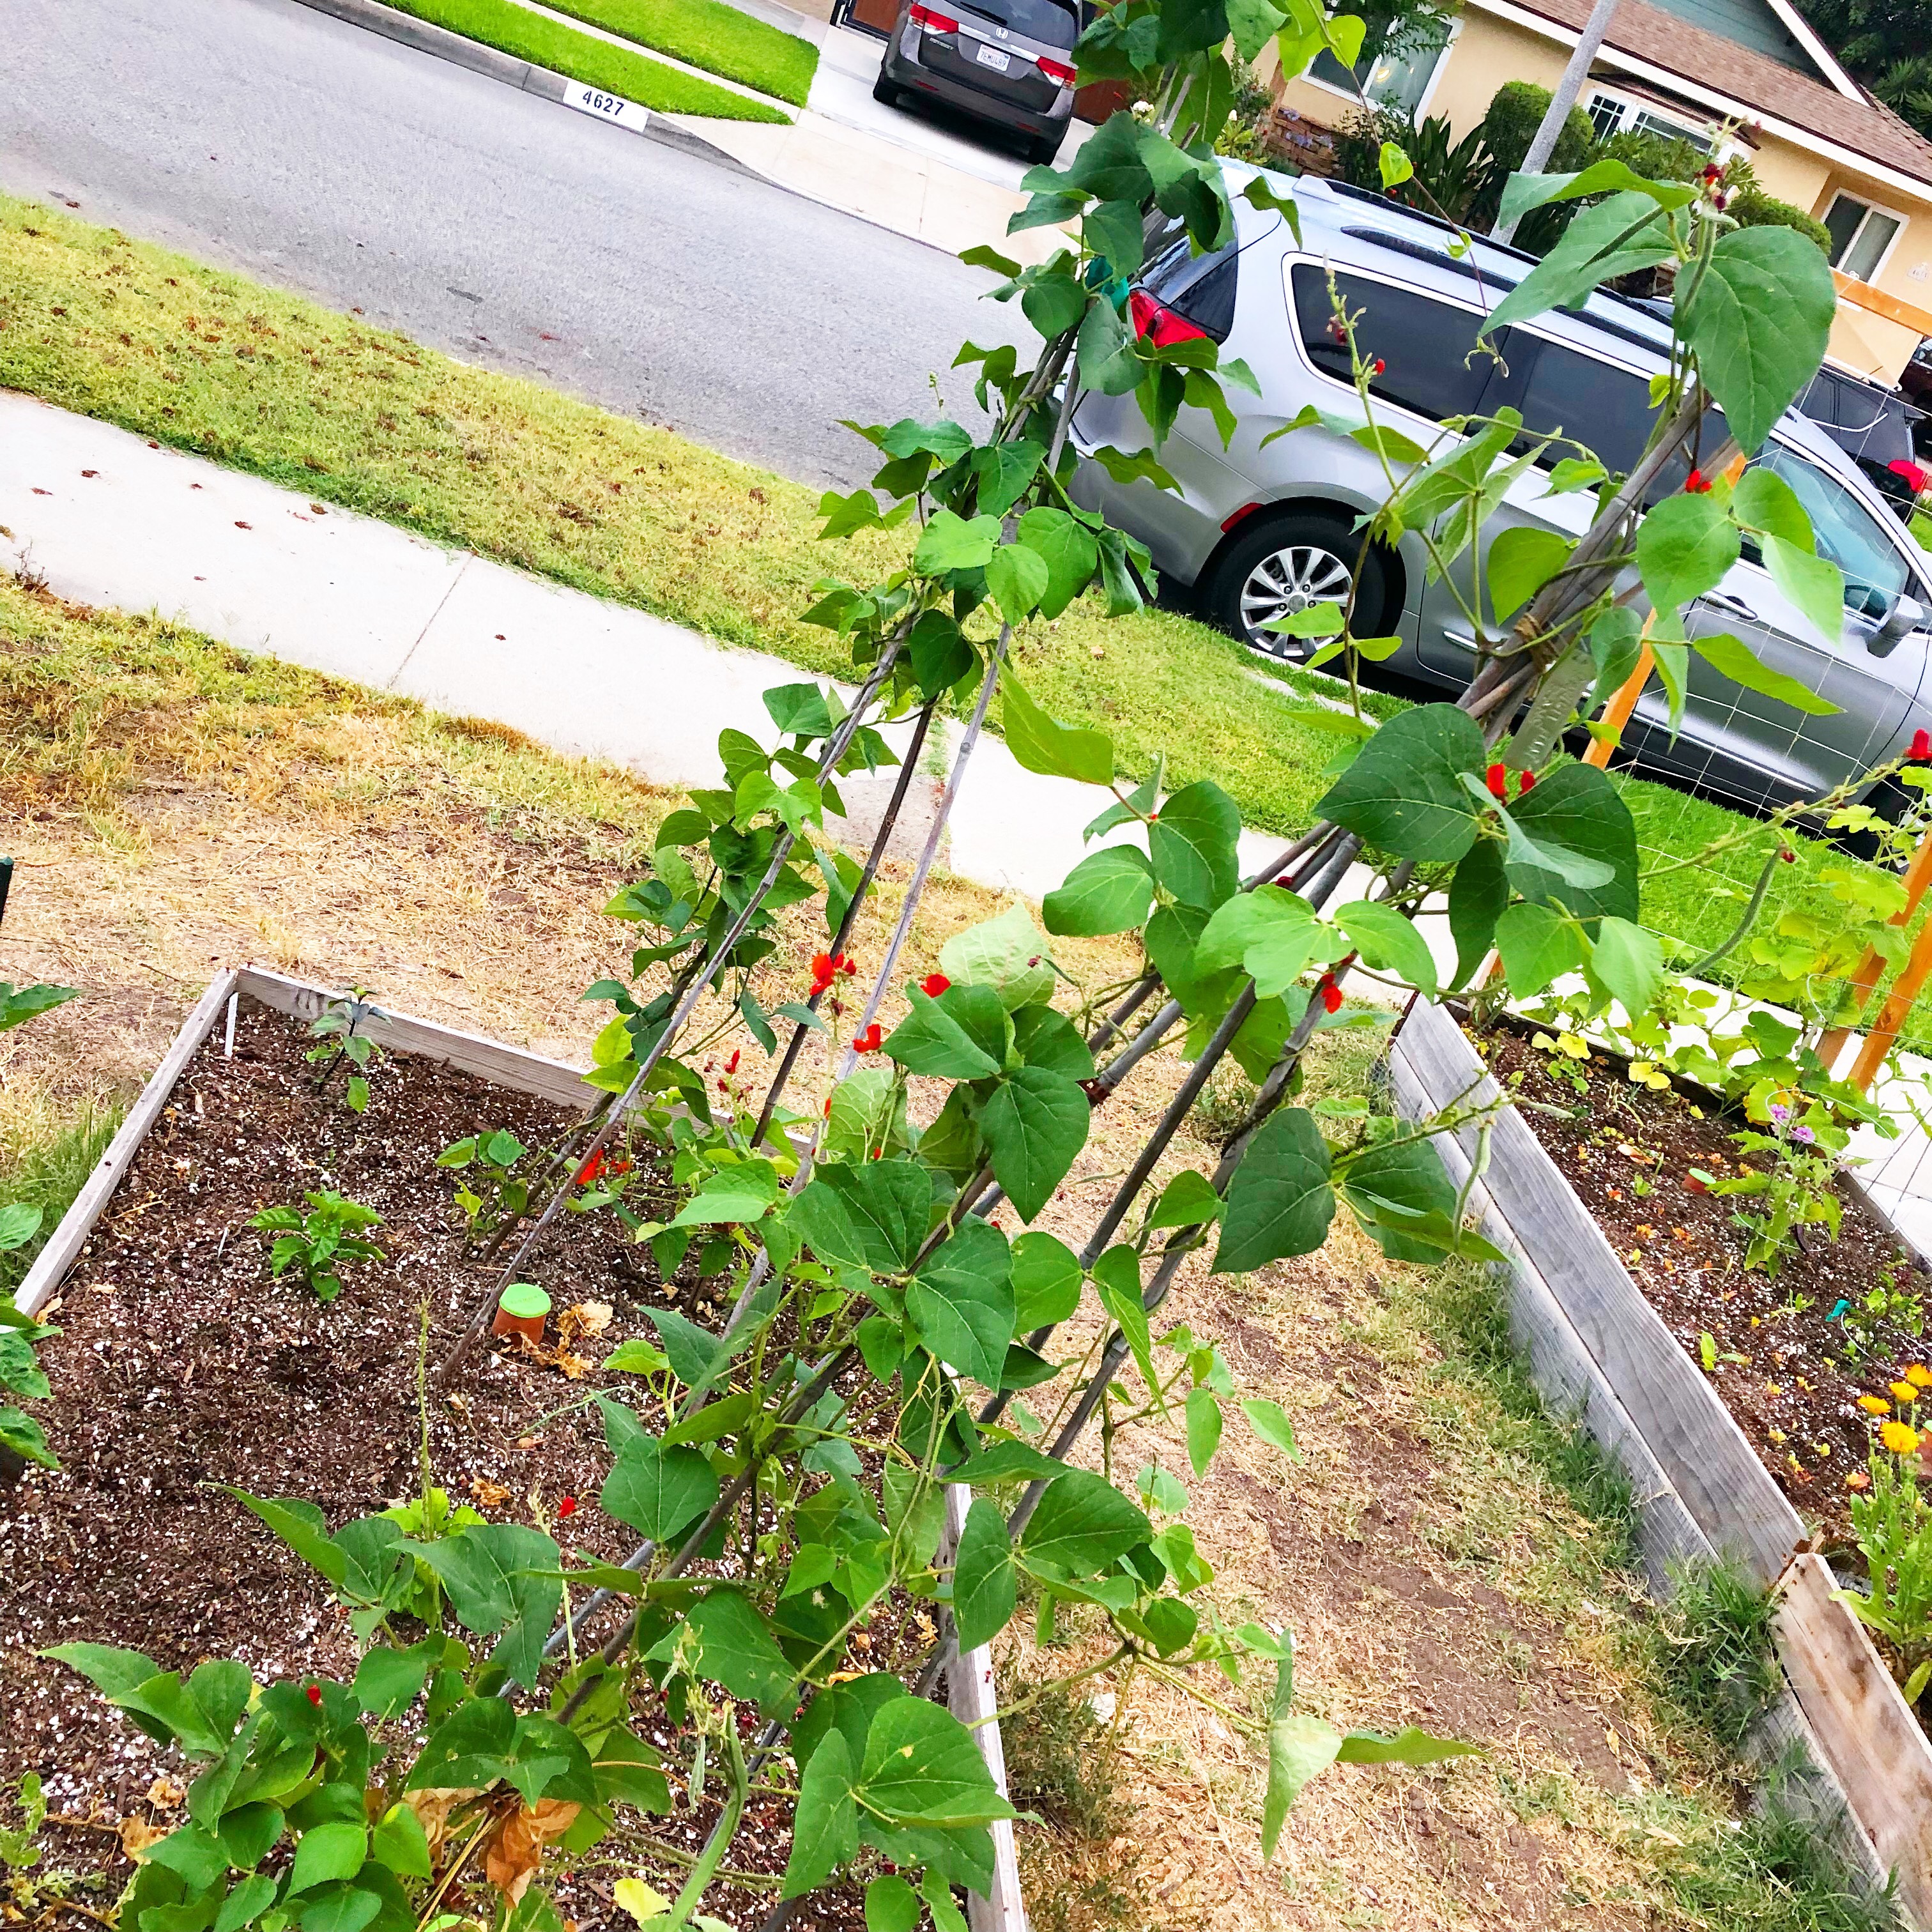
The main idea behind Vertical Gardening is to find better and more efficient ways of using your available space. Along with extending the variety of vegetables, vertical gardening also helps grow healthier plants. Better air circulation, easier to weed and more open space for smaller plants are a few benefits of vertical gardening.

Luis